
Bill Pay Upgrade
A new and improved Bill Pay experience is here!
At Jovia, our goal is to provide a brighter banking experience for our members, like you! That’s why we upgraded Bill Pay.
On this page, you will find information regarding what changed and how to navigate the new system.
What is Bill Pay?
Bill Pay, located in Online and Mobile Banking, makes it easy and convenient to pay a bill and send funds to businesses and people.
Bill Pay is a free service that gives you control over who you pay and when you pay. Use it to pay rent, a phone bill, or even a gift to a friend! With Bill Pay, you can set up one-time or scheduled payments, so you can stay up-to-date on your bills!
You can also access eBills through Bill Pay. eBills allow you to log in to an online account for a third-party website from within the Bill Pay system so Bill Pay can retrieve your billing information. For example, you can use your account login information for your satellite TV provider so Bill Pay can automatically retrieve your monthly bill amount and due date within Jovia's Bill Pay platform and pay the bill for you.
What changed with the upgrade
Easy-to-use interface
Enjoy a consistent experience across online and mobile banking. All Bill Pay options are now available in both online banking and our mobile app, with a consistent look and feel in both places.
Enhanced Management
Create groups for your billers/payees to simplify payments.
Adjustments to when funds are taken out of your account
With the new system, funds for electronic payments will be deducted on the day the payment is sent. You will need to ensure you have enough funds available before scheduling payments.
4 PM cutoff time (Monday-Friday, except holidays)
Electronic payments set up before this 4 PM cutoff time can be scheduled for delivery the next business day.
Automatic Payment Adjustments
Payments may shift from paper checks to electronic where possible to speed up processing.
What you will need to do after the upgrade
1. Accept new terms and conditions.
After the Bill Pay upgrade is complete and you access digital banking, you will be prompted to agree to new terms and conditions.
2. Re-set up your eBills in the new Bill Pay system beginning on 1/27/25.
3. Review your scheduled Bill Payments.
- The upgraded Bill Pay system will attempt to determine if a biller/payee can receive payments electronically instead of by paper check to speed up processing.
- Some payments that were previously sent electronically may change to paper check. As a result, this could extend processing times. Please be sure to double check your payments after the new Bill Payment system is available to ensure your payments are scheduled to go out in a timely fashion.
- If the system finds the biller's/payee's electronic payment information, it will automatically switch the biller/payee to receive electronic payments. This results in a courtesy email letting you know that the payment type has changed for the biller/payee. No action is required on your part.
- With the new Bill Pay system, electronic payment funds are taken out of the funding account on the day the payment is sent, so be sure to have sufficient funds in your account before scheduling a payment to be sent.
- Previously, funds for electronic Bill Pay payments were not taken out of the funding account until one to two days after the payment was sent.
- Funds for check payments will be taken out of the sending account when the recipient deposits the check.
Getting to know the new Bill Pay System
Accessing the New Bill Pay
Getting started is a breeze! Simply log in to your Jovia Online or Mobile Banking account. Once you’re in, you’ll find the upgraded Bill Pay feature right on your dashboard.
Whether you’re using our Online or Mobile Banking, you’ll love the simple, intuitive interface that puts you in control of your payments. Don’t believe it, see for yourself! Here are some helpful videos on how to navigate everyday tasks in the new system:
How to pay a bill in Bill Pay
Bill Pay allows you to easily pay bills. Here's how you can set up and pay a bill.

How to add a biller/payee in Bill Pay
Learn how to add a new Biller in Bill Pay. If the biller/payee is already in our system, it will appear under Add New Billers.

How to group billers/payees in Bill Pay
In Bill Pay, you can now group billers/payees. This feature can help you stay organized and on track with payments.
Frequently Asked Questions
Consumer member
- From the Bill Pay dashboard on the right side, select Add Billers or use the Search bar.
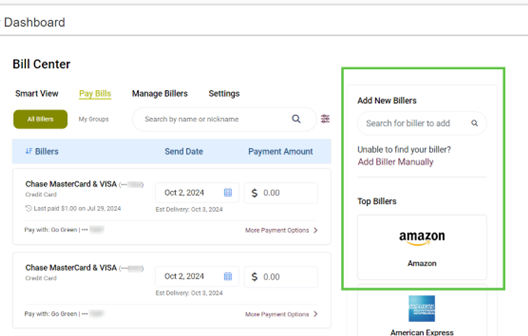
- Type the Biller's name. If the Biller is already in our database, it will appear in the list.
- Select the Biller and click continue. If not, select Add Biller.
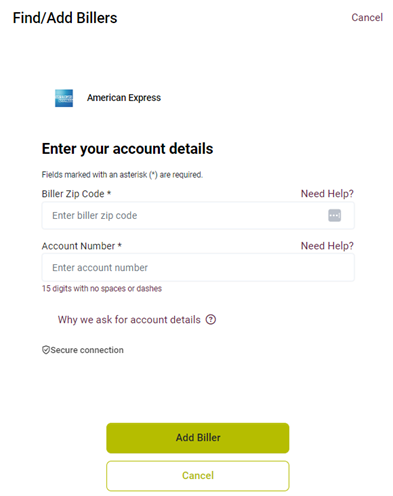
- Add account details by entering the account number found on your bill or statement, confirm the account number, and the biller's zip code. Click continue. A confirmation screen will appear with the Biller's name and the last four digits of the account number, along with the Biller's address. Review your biller’s information for accuracy, then click Add Biller.
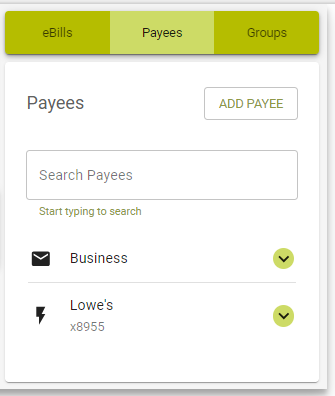
Business member
- Navigate to Bill Pay within online and mobile banking.
- Select a Tax ID.
- Click on the Add Payee button.
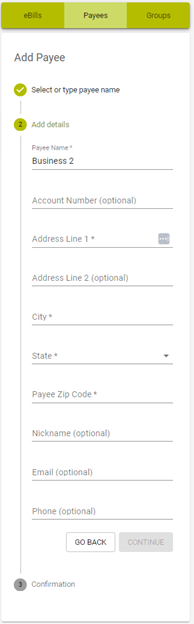
4. Enter a Payee Name and select the payee you want to add and click Continue.
5. Enter the following information for the Payee and click Continue.
- Account Number
- Payee Zip Code
- Nickname (Optional)
- Email (Optional)
- Phone (Optional)
Note: If it is not an electronic payee you will have to enter additional information for the payee such as Address, City and State. This will send a payment via check.
6. The Payee is now created, click continue to end the process.
Consumer member
Once you have added your Billers, you can start paying bills. It’s simple and easy.
- Under Payments & Transfers click on Bill Pay.
- From the dashboard, select Pay Bills.
- Select the Biller. Type in the payment amount and send date, select the account the funds should be paid from and then click on more payment options.

4. Select the frequency. Make a one-time payment, weekly, monthly or choose another frequency. Select the duration for recurring payments. You can repeat the payment until you cancel it or set a specific number of payments to be made.
5. You may add a note for future reference, and if you prefer, you can even choose to receive an alert when the payment is delivered or select Alert Me with the number of days prior to the send date.
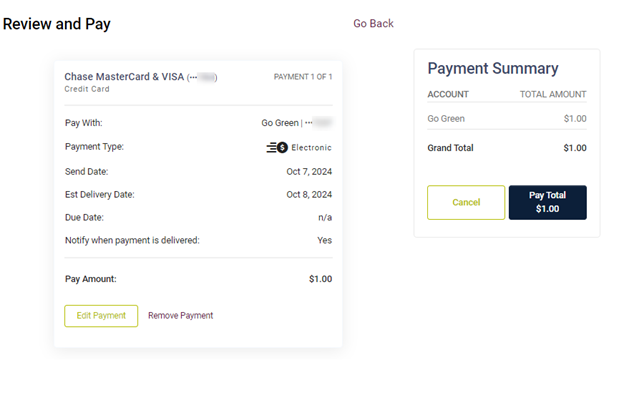
6. Scroll down to the bottom of the list and click Continue. Review the bill and make any necessary changes. Then click Pay.
Note: Please note that on the Mobile App, members will have to select Save Payment Details. Then, select Review Bill at the top. Once you confirm that it’s correct, you can select Pay Total.
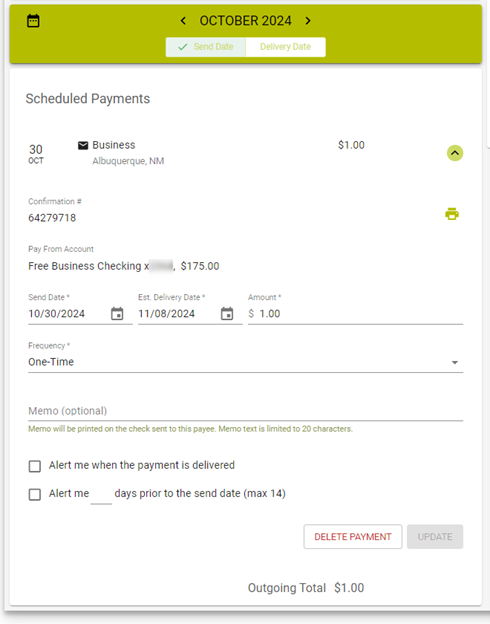
Business member
- Under Additional Services click on Bill Pay.
- Select a Tax ID.
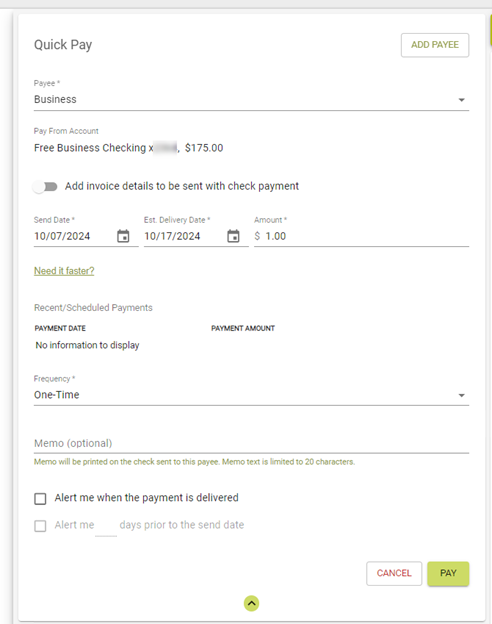
- In the Quick Pay section select the payee you would like to pay.
- Select a Pay From Account.
- Add invoice details to be sent with check payment (optional).
- Select a Send Date or Delivery Date.
- Enter an Amount.
- Select a Frequency.
Note: If a recurring frequency is selected, you will have to select whether to repeat the transaction until it is canceled or enter a number for how many times you want to repeat payments.
9. Add a memo (optional).
10. Using the checkboxes select Alerts you would like for the payment.
11. Click Pay.
An electronic or check payment may be edited or deleted any time before the Send Date.
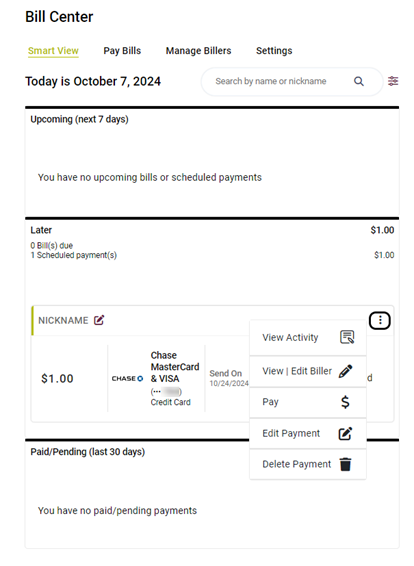
Consumer member
- Under Payments & Transfers click on Bill Pay.
- From Smart View, under Scheduled Payments, find the payment you want to edit or cancel.
- Click the three dots to the right of the payment amount to see all of the payment details.
- Edit any of the fields and click update. OR click Delete Payment in red at the bottom of the payment details to completely cancel the payment.
Business member
- Under Additional Services click on Bill Pay.
- Select a Tax ID.
- Under the Scheduled Payments section click the down arrow next to the payment you want to cancel.
- Click on Delete Payment.
- To confirm the deletion, click Yes, Delete this Payment.
Yes. The Groups feature helps you organize your payments. Use Groups to batch similar billers or create a list of first-half and second-half-of-the-month Billers to help with budget planning.
Consumer member
1. Under Payments & Transfers, click on Bill Pay.
2. In the Manage Billers Section, click Create New Group.
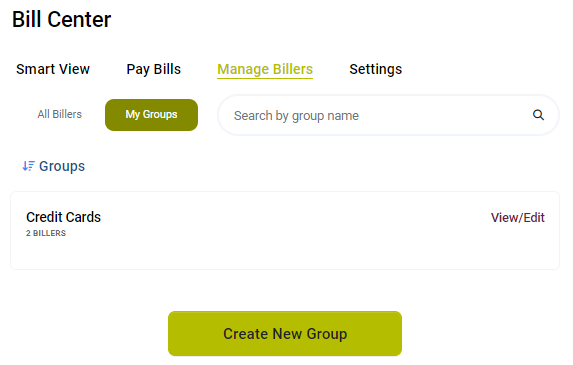
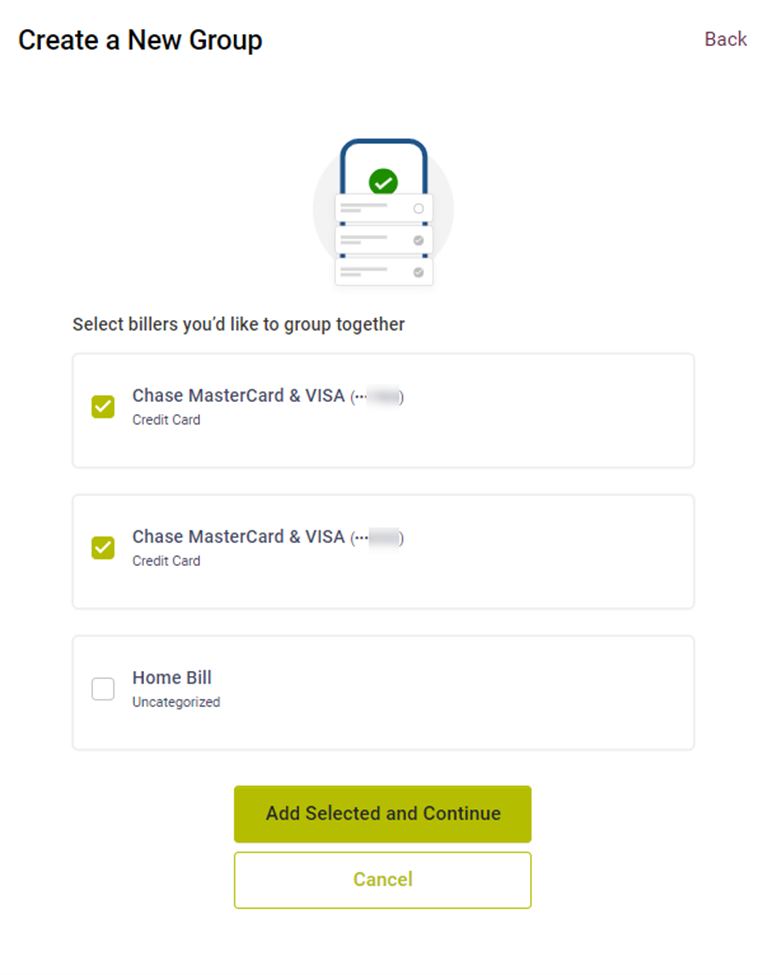
3. Select the billers you would like to group together and select Add Selected and Continue.
4. Enter a unique group name and select Save Group.
Note: Groups can be deleted as well. Just scroll to the bottom of the Group you wish to delete and click the delete button. The billers remain in your Biller list, but the Group will be removed.

Business member
- Under Additional Services click on Bill Pay.
- Select a Tax ID.
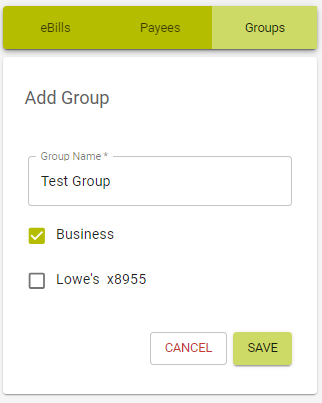
- Under the Groups section, click Add Group.
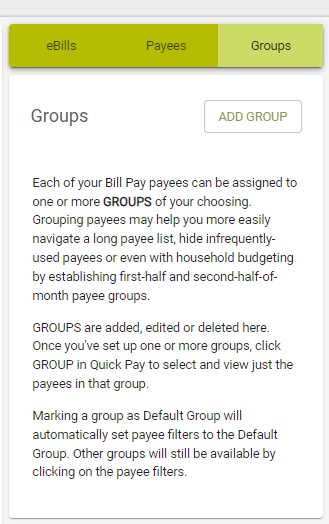
4. Enter a Group Name
5. Select the payees you wish you add to the group.
6. Click Save Group.
Note: Groups can be deleted as well. Click on the drop down arrow next to the Group you wish to delete and click the delete group button, then confirm the deletion. The billers remain in your Biller list, but the Group will be removed.
Yes, once your biller/payee makes your statement available on their website.
No, eBills are only offered by the electronic Billers/Payees listed in the eBills enrollment list.
- Check payments clear your account just like any other check you write. When the biller deposits it to their account or cashes it, the check will go through the normal check clearing process. You will be able to view the check on your account history in online banking after it has cleared.
- Electronic payments are debited via Automated Clearing House (ACH). Automated Clearing House (ACH) is an electronic network for financial transactions in the United States. ACH processes large volumes of credit and debit transactions in batches. Think of it as the engine behind direct deposits and direct payments.
No. Bill Pay only allows you to select valid Send Dates when you schedule payments.
Payments can be sent to almost any payee, either a company or an individual. Depending on the payee, your funds will be sent electronically or via check.